Battle of Inverkeithing
| Battle of Inverkeithing | |||||||
|---|---|---|---|---|---|---|---|
| Part of the Wars of the Three Kingdoms | |||||||
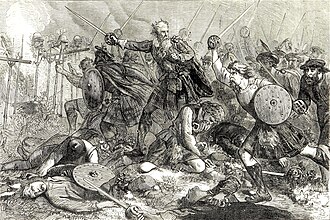 Sir Hector MacLean's charge at Inverkeithing (1873 illustration) | |||||||
| |||||||
| Belligerents | |||||||
|
|
| ||||||
| Commanders and leaders | |||||||
| James Holborne | John Lambert | ||||||
| Strength | |||||||
| More than 4,000 | 4,000 | ||||||
| Casualties and losses | |||||||
|
800 killed 1,000 captured |
8 killed Unknown number wounded | ||||||
| Official name | Battle of Inverkeithing II | ||||||
| Designated | 30 November 2011 | ||||||
| Reference no. | BTL23 | ||||||
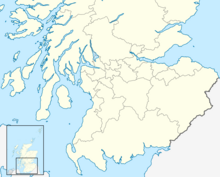
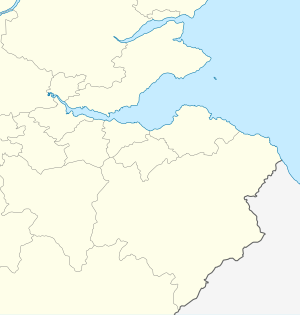
The site of the battle within southern Scotland | |||||||
The Battle of Inverkeithing was fought on 20 July 1651 between an English army under John Lambert and a Scottish army led by James Holborne as part of an English invasion of Scotland. The battle was fought near the isthmus of the Ferry Peninsula, to the south of Inverkeithing, after which it is named.
An English Parliamentary regime had tried, convicted, and executed Charles I, who was king of both Scotland and England in a personal union, in January 1649. The Scots recognised his son, also named Charles, as king of Britain and set about recruiting an army. An English army, under Oliver Cromwell, invaded Scotland in July 1650. The Scottish army, commanded by David Leslie, refused battle until 3 September when it was heavily defeated at the Battle of Dunbar. The English occupied Edinburgh and the Scots withdrew to the choke point of Stirling. For nearly a year all attempts to storm or bypass Stirling, or to draw the Scots out into another battle, failed. On 17 July 1651 1,600 English soldiers crossed the Firth of Forth at its narrowest point in specially constructed flat-bottomed boats and landed at North Queensferry on the Ferry Peninsula. The Scots sent forces to pen the English in and the English reinforced their landing. On 20 July the Scots moved against the English and in a short engagement were routed.
Lambert seized the deep-water port of Burntisland and Cromwell shipped over most of the English army. He then marched on and captured Perth, the temporary seat of the Scottish government. Charles and Leslie took the Scottish army south and invaded England. Cromwell pursued them, leaving 6,000 men to mop up the remaining resistance in Scotland. Charles and the Scots were decisively defeated on 3 September at the Battle of Worcester. On the same day the last major Scottish town holding out, Dundee, surrendered.
Background[edit]
In 1639 and again in 1640 Charles I who was king of both Scotland and England in a personal union, went to war with his Scottish subjects in the Bishops' Wars. These had arisen from the Scots' refusal to accept Charles's attempts to reform the Church of Scotland, known as the Kirk, to bring it into line with English religious practices.[1] Charles was not successful and the ensuing settlement established the Covenanters' hold on Scottish government; they required all civil office-holders, parliamentarians and clerics to sign the National Covenant and granted the Scottish Parliament authority to approve all of the King's councillors in Scotland.[2] After years of rising tensions, in part caused by Charles's defeat in the Bishops' Wars and his need to fund them, the relationship between Charles and his English Parliament also broke down in armed conflict, starting the First English Civil War in 1642.[3][4]
In England, Charles's supporters, the Royalists, were opposed by the combined forces of the Parliamentarians and the Scots, who in 1643 had formed an alliance bound by the Solemn League and Covenant, in which the English Parliament agreed to reform the English church along similar lines to the Scottish Kirk in return for the Scots' military assistance.[5] After four years of war the Royalists were defeated and Charles surrendered to the Scots.[6] After several months of fruitless negotiations, the Scots handed Charles over to the English parliamentary forces in exchange for a financial settlement and left England on 3 February 1647.[7] The English army council pressed Charles to accept the Heads of Proposals, a less demanding set of terms which did not require a Presbyterian reformation of the church.[8] Instead he signed an offer known as the Engagement, which had been thrashed out with the Scottish delegation. Charles agreed to confirm the Solemn League and Covenant by act of parliament in both kingdoms and to accept Presbyterianism in England, although only for a trial period of three years, in return for the Scots' assistance in regaining his throne in England.[9]

After a protracted political struggle the supporters of the Engagement gained a majority in the Scottish Parliament, by which time war had again broken out in England between Royalists and Parliamentarians. The Scots sent an army under the command of the Duke of Hamilton into England to fight on behalf of the King in July, but it was heavily defeated at Preston by a force led by Oliver Cromwell.[10] The rout of the Engager army led to further political upheaval in Scotland and the faction opposed to the Engagement was able to regain control of the government.[10][11]
Exasperated by the prolonged bloodshed the Parliamentarian army purged the English Parliament and established the Rump Parliament, which had Charles tried for treason against the English people. He was executed on 30 January 1649,[12] and the republican Commonwealth was created.[13] The Scottish Parliament, which had not been consulted prior to the King's execution, declared his son, also Charles, king of Britain.[14][15] Before they would permit him to return from exile in the Dutch Republic to take up his crown, they demanded he first sign both Covenants: recognising the authority of the Kirk in religious matters and that of parliament in civil affairs.[16][17][18] Charles II was initially reluctant to accept these conditions, but after Cromwell's campaign in Ireland crushed his Royalist supporters there,[19] he felt compelled to accept the Scottish terms and signed the Treaty of Breda on 1 May 1650. The Scottish Parliament set about rapidly recruiting an army to support the new king and Charles set sail for Scotland, landing on 23 June.[20]
Opposing forces[edit]
Infantry[edit]
Infantry formations, equipment and tactics were similar in both armies.[21] The regiment was the standard tactical unit, but their size was not standardised and varied greatly. An infantry regiment was composed of both musketeers and pikemen.[22] The musketeers were armed with muskets possessing 4-foot-long (1.2 m) barrels and, mostly, matchlock firing mechanisms. These relied on the glowing end of a length of slow match, thin cord soaked in saltpetre, igniting the weapon's priming powder when the trigger was pulled. These were reliable and robust weapons.[23] In 1650 musketeer tactics were in the middle of a transition from firing one rank at a time so as to maintain a steady fire, to the entire unit discharging a volley simultaneously for shock effect.[24][25]
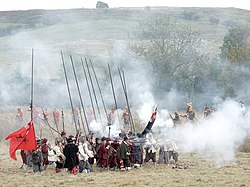
Pikemen were equipped with pikes: long wooden shafts tipped with steel points. Pikes as issued in both armies were 18-foot-long (5.5 m), but on the march they were commonly cut down to a more wieldy 15 ft (4.6 m) or so. The pikemen carried basic swords and typically wore a steel helmet but no other armour.[26] Military manuals of the time suggested a ratio of two musketeers for each pikeman, but in practice commanders usually attempted to maximise the number of musketeers and a higher ratio was the rule.[note 1][22]
Both armies organised their infantry regiments into brigades of three regiments each, which were typically deployed with two regiments abreast and the third behind as a reserve. The men in each unit would form up four or five ranks deep and in a relatively loose formation, with about 3 feet (0.9 m) of frontage per file; so an infantry regiment of 600 might form up 120 men wide and 5 deep, giving it a frontage of 360 feet (110 m) and a depth of 15 feet (4.6 m).[22] The pikemen would be placed in the centre of a formation, in a "stand", with the musketeers divided on each side. The usual tactic against infantry was for the musketeers to fire on their opponents and once it was thought they had been sufficiently weakened or demoralised the stand of pikemen would advance, attempting to break through the enemy centre. This was known as a "push of the pike".[24][25] The musketeers would also advance, engaging the enemy with their musket butts,[note 2] which were steel plated for this purpose and attempting to envelop the opposing formation.[28][29]
Against cavalry, doctrine called for infantry units to tighten the spacing between their files to approximately 18 inches (46 cm) per man and to advance steadily. To be effective against infantry, cavalry needed to break into their formation and if the men were packed together this was not possible. It was accepted that so long as the morale of the infantry held, cavalry could do little against the front of such a formation. However, the flanks and rear were increasingly vulnerable as the infantry packed more closely together, as this made manoeuvring or turning the unit more difficult.[24]
Cavalry[edit]
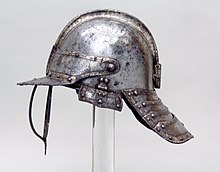
Most of the English cavalry were mounted on large, for the time, horses. The cavalrymen wore metal lobster-tailed pot helmets which protected the head and, usually, the neck, cheeks and, to an extent, face. They wore jackets of thick uncured leather and thigh-length boots. Body armour – a cuirass (metal chest and back plates) – was unusual but not unknown. They were each armed with two pistols and a sword. The pistols were 18 inches (46 cm) to 24 inches (61 cm) long and had a very limited effective range. Most but not all cavalry pistols had flintlock firing mechanisms, which were more reliable in damp or windy weather than matchlock mechanisms. Flintlock mechanisms were more expensive than matchlock ones and were usually reserved for the cavalry, who found igniting and using the slow match while controlling a horse inconvenient. The swords were straight, 3-foot-long (90 cm) and effective at both cutting and thrusting.[26] Cavalry were usually positioned on each flank of the infantry.[25]
The Scottish cavalry were similarly equipped, with helmets, pistols and swords, and no body armour, although many bore lances rather than pistols.[30] The main difference was that the Scottish horses were smaller and lighter; this gave them more nimble but put them at a disadvantage in a face-to-face confrontation. Their tactics depended on manoeuvrability and a hit-and-run approach, their commanders recognising that they could not withstand the English in a face-to-face encounter.[31][32] English cavalry tactics were intended to utilise their strengths. They would advance in a tight formation, their riders' legs interlocked, at no faster than a trot – to maintain formation. They would discharge their pistols at very short range and upon coming into contact attempt to use the sheer weight of their mounts and the mass of their formation to force back their opponents and burst through their ranks.[33]
Both armies contained dragoons. These had originated as mounted infantry, using horses to increase their operational mobility and dismounting to fight with pikes or muskets. By 1650 they had largely become specialist mounted troops; none carried pikes. The English dragoons had exchanged their muskets for carbines (shorter-barrelled versions of the infantry's muskets) or, occasionally, pistols and been formally recognised as a cavalry arm.[34] Scottish dragoons were part way through this transformation and carried both matchlock muskets and cavalry swords.[31] Dragoons usually acted as scouts, or formed their army's rearguard.[26]
Prelude[edit]
English invasion of Scotland[edit]
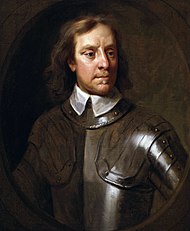
Scotland was actively rearming and the leaders of the English Commonwealth felt threatened. They pressured Thomas Fairfax, lord general of the New Model Army, which at this point was synonymous with the Parliamentarian army, to launch a preemptive attack.[35] Fairfax was unwilling to strike the first blow against his former allies, believing England and Scotland were still bound by the Solemn League and Covenant.[35] Oliver Cromwell succeeded him as commander-in-chief of the New Model Army and led it across the Tweed into Scotland on 22 July 1650 and so starting the Third English Civil War.[36]
Once the Treaty of Breda had been signed the Scottish Parliament started levying men to form a new army, under the command of the experienced general David Leslie.[20] By the time Cromwell entered Scotland Leslie had some 8,000–9,500 infantry and 2,000–3,000 cavalry, although these numbers fluctuated during the course of the campaign.[37] The government instituted a commission to purge the army of anyone suspected of having supported the Engagement, as well as men considered sinful or undesirable.[note 3][36] This was opposed, unsuccessfully, by much of the Scottish nobility and the more experienced military leaders, including Leslie. The purge removed many experienced men and officers and the bulk of the army was composed of raw recruits with little training or experience.[39]
Leslie prepared a defensive line of earthworks between the Scottish capital Edinburgh and Leith,[40] employed a scorched earth policy from there to the Scottish border and allowed Cromwell to advance unopposed.[39] Lack of supplies and the hostility of the local people towards the English invaders forced Cromwell to rely on intermittent seaborne supplies.[41] Cromwell attempted to bring the Scots to battle at Edinburgh but he was not able to draw Leslie out.[42] Cromwell's attack coincided with a visit by Charles II to the Scottish army, where he was warmly received. Members of the Covenanter government, concerned their godly war would be corrupted by feelings of personal loyalty to the King, ordered a new purge, which removed 80 officers and 4,000 of Leslie's men.[42]
On 31 August Cromwell withdrew;[41] the English army reached Dunbar on 1 September,[43] having taken two days to march the final 17 miles (27 km), harassed day and night by the pursuing Scots.[44] The Scottish army outflanked the English and a detachment blocked the road to Berwick and England at the easily defended Cockburnspath Defile. The Scots' main force encamped on the all but invulnerable Doon Hill, 2 miles (3 km) south of Dunbar, where it overlooked the town and the coastal road running south west from the town.[45][46] On 2 September Cromwell surveyed the situation and wrote to the governor of Newcastle warning him to prepare for a possible Scottish invasion.[47]
Battle of Dunbar[edit]

Believing the English army was in a hopeless situation and under pressure to finish it off rapidly,[48][49] Leslie moved his army off the hill and into a position to attack Dunbar.[50][45] On the night of 2/3 September Cromwell manoeuvred his army so as to be able to launch a concentrated pre-dawn attack against the Scottish right wing. The Scots were caught by surprise but put up a stout resistance.[30][51] Their cavalry were pushed back by the English,[52] while Leslie was unable to deploy most of his infantry into the battle because of the nature of the terrain.[53][54] The battle was undecided when Cromwell personally led his cavalry reserve in a flank attack on the two Scottish infantry brigades which had managed to come to grips with the English and rolled up the Scottish line.[55][56] Leslie executed a fighting withdrawal but some 6,000 Scots, from his army of 12,000, were taken prisoner and approximately 1,500 killed or wounded.[57][58]
When news of the defeat reached Edinburgh, many people fled the city in panic, but Leslie sought to rally what remained of his army and build a new defensive line at Stirling. This was a narrow choke point which blocked access to north-east Scotland, the major source of supplies and recruits for the Scots. There he was joined by the bulk of the government, clergy and Edinburgh's mercantile elite. Cromwell captured Edinburgh and the port of Leith with little difficulty.[59] Edinburgh Castle held out until December.[60] The historian Austin Woolrych described the behaviour of the occupying troops as "exemplary" and observed that after a short time many fugitives returned to the city and its economic life returned to something akin to normality.[61]
After the defeat at Dunbar Leslie attempted to resign as head of the army, but the Scottish government would not permit it, largely because of a lack of any plausible replacement.[61] Several of his officers refused to take orders from him and left to join a new army which was being raised by the Western Association.[61] In the Scottish government the more practical blamed the purges for Leslie's defeat and looked to bring the Engagers back into the fold; the more dogmatic thought God had deserted them because the purges had not gone far enough and argued that too much faith had been put in a worldly prince who was not sufficiently committed to the cause of the Covenant.[62] These more radical elements issued the divisive Western Remonstrance, which castigated the government for its failure to properly purge the army and further widened the rifts among the Scots.[63] The Remonstrants, as this group became known, took command of the Western Association army and attempted to negotiate with Cromwell, urging him to depart Scotland and leave them in control; Cromwell rejected their advances and destroyed their army at the Battle of Hieton (near the centre of modern Hamilton) on 1 December.[60][64] On 1 January 1651 Charles was formally crowned at Scone.[65]
Manoeuvres[edit]

During December 1650 Charles and the Scottish government reconciled with the Engagers who had been purged and with Highland chiefs who had been excluded by their refusal to sign the Covenant.[60] These competing factions were poorly coordinated[66] and it was not until the late spring of 1651 that they were fully integrated into the Scottish army.[60] In January 1651 the English attempted to outflank Stirling by shipping a force across the Firth of Forth, but this was unsuccessful.[67] In early February the English army advanced against Stirling, then retreated in dreadful weather; Cromwell himself fell ill.[68]
In late June the Scottish army advanced south. The English moved north from Edinburgh to meet them, but Leslie positioned his army north of Falkirk, behind the River Carron. This position was too strong for Cromwell to assault; Leslie resisted every provocation to fight another open battle and eventually withdrew. Cromwell followed and attempted to bypass Stirling, but was unable to.[67] He then marched to Glasgow and sent raiding parties into Scottish-held territory. The Scottish army shadowed the English, moving south west to another strong position at Kilsyth on 13 July.[69][70] The English moved back to the east and the Scots returned to the Carron. The English stormed and captured the outlying Scottish position of Callendar House, but Leslie still declined to be drawn out. Cromwell probably intended the action less as an attempt to provoke Leslie into battle and more to draw the Scots' attention away from activities taking place further east.[70]
Crossing the Forth[edit]
English landing[edit]
Late in 1650 the Council of State, the executive authority of the English Commonwealth, had ordered the construction of 50 flat-bottomed boats, which arrived in Leith in June 1651.[71] The Scots anticipated the possibility of another attempt to cross the Forth and established a garrison at Burntisland.[72] Early on 17 July,[72] an English force consisting of the garrison of Leith, Daniel's Regiment of Foot and four troops of Colonel Robert Overton's Regiment of Horse, boarded the flat-bottomed boats.[70] They totalled 1,600 men, under the overall command of Overton,[73] and they crossed at the Firth of Forth at its narrowest point, landing at North Queensferry on the Ferry Peninsula. The Scottish troops at Burntisland moved towards the English landing place, sent for reinforcements from Stirling and Dunfermline and dug in to await them. For the next four days the English shipped the balance of their force across the Forth and Major-general John Lambert took command.[72][73]
Numbers[edit]
By the morning of 20 July the English had assembled four infantry and three cavalry regiments on the north shore of the Forth. They were a mixture of experienced veteran units and freshly raised troops; one cavalry regiment may have consisted of militia. The historian Stuart Reid suggests the English were "very much a scratch force".[74] They totalled approximately 4,000 men.[69]
The Scots had three infantry regiments brigaded under Major-general James Holborne and 500 Highlanders led by Hector Maclean of Duart; and three cavalry regiments commanded by John Browne of Fordell with some smaller mounted units attached. Much of the garrison at Burntisland is believed to have also been present, but their number is not known.[75] The historian Austin Woolrych states the Scots had more than 4,000 men.[69]
Engagement[edit]
The Ferry Peninsula is separated from the rest of Fife by a narrow isthmus, about half a mile (800 m) wide and is dominated by the Ferry Hills, rising 240 feet (73 m) above sea level. Immediately beyond the peninsula, to the north-west, the ground rises up again to Castland Hill, 207 feet (63 m) high. This commands both the coastal road, which ran through the village of Inverkeithing to its east, and the route north to Dunfermline and is a naturally strong defensive position. On 20 July the Scots advanced through these hills but then moved south west closer to the isthmus and the English entrenchments on the Ferry Hills. Holborne, believing the Scots outnumbered by the recently reinforced English force, ordered his men to pull back. Lambert, also of the opinion he had the numerically superior force, sent a cavalry regiment to harass the Scots' rearguard. Holborne promptly turned to face the English in battle order on the lower slopes of Castland Hill.[76]

Details of the battle are uncertain, but it seems the Scottish infantry brigade formed up in the centre, with Browne's cavalry on their right and the smaller mounted units and the Highlanders to the left. The English also had their infantry in the centre with their cavalry more evenly divided between the flanks, but with the greater weight on their right.[77][78] Activity then stalled for an hour and a half, neither party willing to initiate a battle. When a messenger arrived for Lambert with news that further Scottish reinforcements were on their way from Stirling he felt compelled to take the offensive.[77]
Browne's cavalry brigade, facing the weaker English flank, charged it and routed some of the English cavalry. All of Browne's cavalry were committed to this fight and so there was no reserve to exploit the advantage. The English had maintained a reserve which counter-charged the disordered Scots, routing them in turn and capturing Browne,[77] who later died of his wounds.[70] The fight went similarly on the other flank, the Scots being initially successful before being routed by the English reserve cavalry, likely personally led by Lambert. After the battle Lambert found two spent bullets lodged in his jacket.[77] This part of the battle was over in less than 30 minutes.[70]
The infantry did not engage during the cavalry duels and there is a contemporary suggestion Holborne failed to exploit the Scottish cavalry's initial success with a prompt advance by his infantry. With the battle lost the Scottish infantry attempted to retreat from the field. They were pursued by the English cavalry for 6 miles (10 km) with two of their regiments managing to get away in good order, while the third, and Duart's Highlanders, were wiped out, many men being taken prisoner and Duart being killed.[79][80] Holborne was among those who escaped; he was court-martialled but exonerated.[81]
Lambert claimed to have killed 2,000 of the enemy and captured 1,400 and to have suffered only 8 Englishmen killed, along with an unknown number wounded.[82] Sir James Balfour, a senior officer in the Scottish army, wrote in his journal that about 800 Scots were killed in total.[83] Modern sources believe approximately 1,000 Scots were captured.[84] The site of the battle has been designated by Historic Environment Scotland in its Inventory of Historic Battlefields as a battlefield of national importance.[81]
Aftermath[edit]

After the battle Lambert marched 6 miles (10 km) east and occupied the deep-water port of Burntisland.[71] Cromwell captured the fortified island of Inchgarvie and shipped most of the English army to Burntisland, assembling 13,000 to 14,000 men there by 26 July. Only eight regiments were left south of the Forth, all garrisoning Edinburgh.[79] Realising this left open the way into England for the Scots, Cromwell issued contingency orders as to what measures to take if this was to occur.[79][69] He then ignored the Scottish army at Stirling and on 31 July marched on the seat of the Scottish government at Perth, which he besieged. Perth surrendered after two days cutting off the Scottish army from reinforcements, provisions and materiel.[71][85][86] Charles and Leslie, seeing no hope of victory if they stayed to face Cromwell, marched south and invaded England in the desperate hope of sparking a Royalist uprising.[85] Cromwell and Lambert followed, shadowing the Scottish army while leaving General George Monck with 6,000 of the least experienced men to mop up what Scottish resistance remained.[87]
By the end of August Monck had captured Stirling, Alyth and St Andrews. Dundee and Aberdeen were the last significant Scottish strongholds. Monck drew up his full army outside Dundee on 26 August and demanded its surrender. The governor, believing the town walls and the local militia strong enough to withstand the English, refused. Infuriated at having to risk his men's lives with an assault when the war was all but over, Monck gave permission for the town to be sacked once it was captured. After a three-day bombardment[88] the hungry and war-weary English troops[89] stormed the west and east ports on 1 September,[88] broke into the town and thoroughly sacked it; several hundred civilians, including women and children, were killed.[90] Subsequently strict military discipline was enforced.[91] On hearing the news from Dundee, Aberdeen promptly surrendered, ending effective Scottish resistance.[92]
Meanwhile, Cromwell and his forces overtook the Scottish army at Worcester and on 3 September 1651 defeated them at the Battle of Worcester. Leslie, along with most of the Royalist commanders, was captured; he was imprisoned in the Tower of London and would remain there until the 1660 Restoration. Charles II himself managed to escape the field.[93] The Scottish Covenanter government was abolished and the English commanders imposed military rule.[94]
After Cromwell's death on 3 September 1658 there was political turmoil. Eventually Monck led his army south, crossing the Tweed on 2 January 1660 and entering London on 3 February where he called new parliamentary elections. The new parliament invited Charles back as the monarch of both England and Scotland – still separate kingdoms – on 1 May.[95] Scotland and England formally united as a single nation on 28 April 1707.[96]
Notes, citations and sources[edit]
Notes[edit]
- ^ The Parliamentarian New Model Army was formed in 1645 with three musketeers for each pikeman. By 1650 some Royalist regiments had dispensed with pikemen altogether, although this was not the case with any of those at Inverkeithing.[22]
- ^ Bayonets were not used by British infantry until the 1660s.[27]
- ^ The Committee for Purging the Army, established on 21 June.[38]
Citations[edit]
- ^ Kenyon & Ohlmeyer 2002, pp. 15–16.
- ^ Stewart 2016, pp. 124–125.
- ^ Rodger 2004, pp. 413–415.
- ^ Woolrych 2002, pp. 229–230.
- ^ Woolrych 2002, p. 271.
- ^ Woolrych 2002, pp. 329–330.
- ^ Woolrych 2002, pp. 340–349.
- ^ Gentles 2002, pp. 144–150.
- ^ Stewart 2016, pp. 258–259.
- ^ a b Furgol 2002, p. 64.
- ^ Young 1996, p. 215.
- ^ Woolrych 2002, pp. 430–433.
- ^ Gentles 2002, p. 154.
- ^ Dow 1979, p. 7.
- ^ Kenyon & Ohlmeyer 2002, p. 32.
- ^ Furgol 2002, p. 68.
- ^ Woolrych 2002, p. 481.
- ^ Dow 1979, pp. 7–8.
- ^ Ohlmeyer 2002, pp. 98–102.
- ^ a b Furgol 2002, p. 65.
- ^ Reese 2006, p. 41.
- ^ a b c d Reid 2008, p. 30.
- ^ Reese 2006, pp. 28–29.
- ^ a b c Reid 2008, p. 31.
- ^ a b c Reese 2006, p. 29.
- ^ a b c Reese 2006, p. 28.
- ^ Ffoulkes & Hopkinson 2013, p. 108.
- ^ Reese 2006, pp. 29, 41.
- ^ Royle 2005, p. 194.
- ^ a b Brooks 2005, p. 516.
- ^ a b Reese 2006, p. 40.
- ^ Reid 2008, p. 56.
- ^ Reid 2008, p. 32.
- ^ Reid 2008, pp. 32–33.
- ^ a b Woolrych 2002, p. 482.
- ^ a b Dow 1979, p. 8.
- ^ Reid 2008, pp. 39–40.
- ^ Reid 2008, p. 27.
- ^ a b Woolrych 2002, p. 483.
- ^ Hutton & Reeves 2002, p. 221.
- ^ a b Edwards 2002, p. 258.
- ^ a b Woolrych 2002, pp. 484–485.
- ^ Brooks 2005, p. 513.
- ^ Reese 2006, pp. 67–68.
- ^ a b Brooks 2005, p. 514.
- ^ Reese 2006, p. 68.
- ^ Woolrych 2002, p. 485.
- ^ Royle 2005, p. 579.
- ^ Reid 2008, p. 57.
- ^ Wanklyn 2019, p. 138.
- ^ Royle 2005, p. 581.
- ^ Reese 2006, pp. 89–90.
- ^ Reese 2006, pp. 91, 94.
- ^ Reid 2008, p. 75.
- ^ Reese 2006, pp. 96–97.
- ^ Reid 2008, pp. 74–75.
- ^ Brooks 2005, p. 515.
- ^ Reid 2008, pp. 39, 75–77.
- ^ Woolrych 2002, p. 487.
- ^ a b c d Furgol 2002, p. 69.
- ^ a b c Woolrych 2002, p. 488.
- ^ Furgol 2002, pp. 67–69.
- ^ Woolrych 2002, p. 490.
- ^ Woolrych 2002, p. 491.
- ^ Reid 2008, p. 84.
- ^ Woolrych 2002, p. 493.
- ^ a b Reid 2008, p. 85.
- ^ Reid 2008, pp. 82, 84.
- ^ a b c d Woolrych 2002, p. 494.
- ^ a b c d e Reese 2006, p. 115.
- ^ a b c Wanklyn 2019, p. 140.
- ^ a b c Reid 2008, pp. 85–86.
- ^ a b Ashley 1954, p. 51.
- ^ Reid 2008, p. 86.
- ^ Reid 2008, pp. 86–87.
- ^ Reid 2008, pp. 86, 88–89.
- ^ a b c d Reid 2008, p. 89.
- ^ Ashley 1954, p. 52.
- ^ a b c Reese 2006, p. 116.
- ^ Reid 2008, pp. 87, 89.
- ^ a b Historic Environment Scotland & BTL23.
- ^ Reid 2008, p. 90.
- ^ Reid 2008, pp. 90–91.
- ^ Stewart 2021, p. 176.
- ^ a b Reid 2008, p. 91.
- ^ Woolrych 2002, pp. 494–495.
- ^ Woolrych 2002, pp. 494–496.
- ^ a b Woolrych 2002, pp. 494–497.
- ^ Stewart 2021, p. 46.
- ^ Stewart 2017, p. 176.
- ^ Royle 2005, p. 609.
- ^ Woolrych 2002, pp. 497, 499.
- ^ Woolrych 2002, pp. 498–499.
- ^ Dow 1979, p. 22.
- ^ Stewart 2021, p. 49.
- ^ Stewart 2021, pp. 92–93.
Sources[edit]
- Ashley, Maurice (1954). Cromwell's Generals. London: Jonathan Cape. OCLC 557043110.
- Brooks, Richard (2005). Cassell's Battlefields of Britain and Ireland. London: Weidenfeld & Nicolson. ISBN 978-0-304-36333-9.
- Dow, F.D. (1979). Cromwellian Scotland 1651–1660. Edinburgh: John Donald Publishers. ISBN 978-0-85976-049-2.
- Edwards, Peter (2002). "Logistics and Supply". In Kenyon, John & Ohlmeyer, Jane (eds.). The Civil Wars: A Military History of England, Scotland and Ireland 1638–1660. Oxford: Oxford University Press. pp. 234–271. ISBN 978-0-19-280278-1.
- Ffoulkes, Charles John & Hopkinson, Edward Campbell (2013) [1938]. Sword, Lance & Bayonet: a Record of the Arms of the British Army & Navy. Cambridge: Cambridge University Press. ISBN 978-1-107-67015-0.
- Furgol, Edward (2002). "The Civil Wars in Scotland". In Kenyon, John & Ohlmeyer, Jane (eds.). The Civil Wars: A Military History of England, Scotland and Ireland 1638–1660. Oxford: Oxford University Press. pp. 41–72. ISBN 978-0-19-280278-1.
- Gentles, Ian (2002). "The Civil Wars in England". In Kenyon, John & Ohlmeyer, Jane (eds.). The Civil Wars: A Military History of England, Scotland and Ireland 1638–1660. Oxford: Oxford University Press. pp. 103–154. ISBN 978-0-19-280278-1.
- Historic Environment Scotland (14 December 2012). "Battle of Inverkeithing II (BTL23)". Retrieved 4 November 2020.
- Hutton, Ronald & Reeves, Wiley (2002). "Sieges and Fortifications". In Kenyon, John & Ohlmeyer, Jane (eds.). The Civil Wars: A Military History of England, Scotland and Ireland 1638–1660. Oxford: Oxford University Press. pp. 195–233. ISBN 978-0-19-280278-1.
- Kenyon, John & Ohlmeyer, Jane (2002). "The Background to the Civil Wars in the Stuart Kingdoms". In Kenyon, John & Ohlmeyer, Jane (eds.). The Civil Wars: A Military History of England, Scotland and Ireland 1638–1660. Oxford: Oxford University Press. pp. 3–40. ISBN 978-0-19-280278-1.
- Ohlmeyer, Jane (2002). "The Civil Wars in Ireland". In Kenyon, John & Ohlmeyer, Jane (eds.). The Civil Wars: A Military History of England, Scotland and Ireland 1638–1660. Oxford: Oxford University Press. pp. 73–102. ISBN 978-0-19-280278-1.
- Reese, Peter (2006). Cromwell's Masterstroke: The Battle of Dunbar 1650. Barnsley: Pen & Sword. ISBN 978-1-84415-179-0.
- Reid, Stuart (2008) [2004]. Dunbar 1650: Cromwell's Most Famous Victory. Oxford: Osprey Publishing. ISBN 978-1-84176-774-1.
- Rodger, N.A.M. (2004). The Safeguard of the Sea. London: Penguin. ISBN 978-0-14-029724-9.
- Royle, Trevor (2005) [2004]. Civil War: The Wars of the Three Kingdoms, 1638–1660. London: Abacus. ISBN 978-0-349-11564-1.
- Stewart, Laura A. M. (2016). Rethinking the Scottish Revolution. Oxford: Oxford University Press. ISBN 978-0-19-871844-4.
- Stewart, Laura A. M. (2017). "Cromwell and the Scots". In Mills, Jane A. (ed.). Cromwell's Legacy. Manchester: Manchester University Press. pp. 171–190. ISBN 978-0-7190-8090-6.
- Stewart, Laura A. M. (2021). Union and Revolution: Scotland and Beyond, 1625–1745. The New History of Scotland. Edinburgh: Edinburgh University Press. ISBN 978-1-4744-1015-1.
- Wanklyn, Malcolm (2019). Parliament's Generals: Supreme Command and Politics During the British Wars 1642–51. Barnsley: Pen & Sword. ISBN 978-1-4738-9836-3.
- Woolrych, Austin (2002). Britain in Revolution 1625–1660. Oxford: Oxford University Press. ISBN 978-0-19-820081-9.
- Young, John R. (1996). The Scottish Parliament 1649–1661: A Political and Constitutional Analysis. Edinburgh: John Donald Publishers. ISBN 978-0-85976-412-4.

