
Battle of St. Charles
| Battle of St. Charles | |||||||
|---|---|---|---|---|---|---|---|
| Part of the American Civil War | |||||||
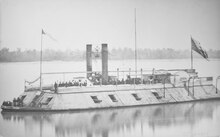
 The Battle at St. Charles, White River, Arkansas—Explosion of the "Mound City" by Alexander Simplot | |||||||
| |||||||
| Belligerents | |||||||
|
|
| ||||||
| Commanders and leaders | |||||||
|
| |||||||
| Strength | |||||||
| |||||||
 St. Charles Location within Arkansas | |||||||
The Battle of St. Charles was fought on June 17, 1862, at St. Charles, Arkansas, during the American Civil War. Earlier in 1862, a Union Army force commanded by Major General Samuel R. Curtis moved against Little Rock, Arkansas, but became bogged down in the Batesville area due to lack of supplies. The Union leadership decided to send a naval force from Memphis, Tennessee, up the White River to resupply Curtis's men. Major General Thomas C. Hindman, the Confederate commander in Arkansas, had fortifications constructed near St. Charles to stop the Union movement. Two artillery positions were built, and three ships, including CSS Maurepas, were scuttled to obstruct the river.
The Union ships advanced against the Confederate positions on June 17. The 46th Indiana Infantry Regiment was sent ashore to attack the fortifications on land, while two ironclads and two timberclads attacked the fort from the river. During the fighting, a Confederate solid shot struck the ironclad USS Mound City, puncturing one of the ship's steam drums. In what has been referred to as the deadliest shot of the war, scalding steam filled the ship, killing or wounding all but about 25 of the roughly 175 men on the vessel. The 46th Indiana overran the Confederate defenses on land and the position was taken. The supply mission was unable to make it all the way to Curtis's position, and withdrew back down the river due to low water levels. Thereafter, Curtis's army cut loose from their supply line and marched to Helena, Arkansas. A portion of the battlefield is listed on the National Register of Historic Places as the St. Charles Battle Site.
Background[edit]
Early activity in Arkansas[edit]
After the election of Abraham Lincoln as President of the United States in 1860, several southern states considered seceding from the union. The southern state of Arkansas held a statewide election on February 18, 1861, to create a convention to vote on secession, with anti-secessionist delegates initially holding the majority. Slavery was considered to be a key issue. After convening on March 4 (the same day that Lincoln was inaugurated), the convention adjourned on March 21 without reaching a conclusion.[1] The bombardment of Fort Sumter by Confederate troops, forcing the surrender of the United States-held fort in seceded territory on April 12[2] swung political opinion to secession, and the convention reconvened on May 6, voting to secede later that day. Arkansas then joined the Confederate States of America.[1]
After significant military activity in Missouri throughout 1861, Major General Earl Van Dorn of the Confederate States Army formed the Army of the West in early March 1862 from forces commanded by Missouri State Guard Major General Sterling Price and Confederate Brigadier General Ben McCulloch. Van Dorn moved his army north towards the Union army of Major General Samuel R. Curtis, but was defeated at the Battle of Pea Ridge on March 7 and 8.[3] After the defeat, Van Dorn moved his troops east of the Mississippi River, with the movement completed by late April. During the process, Van Dorn essentially stripped Arkansas of its military strength and supplies, and weakened the Confederate Trans-Mississippi Department.[4]
Curtis fell back into Missouri after the battle, but then moved his army east to West Plains before turning south. They re-entered Arkansas on April 29 and headed for Batesville.[5] By May 2, the Union soldiers had reached Batesville. A separate column commanded by Brigadier General Frederick Steele reached Jacksonport, which was near Batesville and on the White River, on May 4. Curtis absorbed Steele's men into his force and began to move on the state capital at Little Rock.[6] The movement caused the Confederate government of Arkansas to retire to Hot Springs,[7] and Curtis's men crossed the White River near Batesville.[6] On May 19, a small Union force crossed the Little Red River to forage, but was attacked by Confederate cavalry near Searcy; some of the Union soldiers, including wounded men, were murdered while attempting to surrender.[8] Curtis was informed the next day that his line of supply was at the breaking point, and he decided that further advance without a new supply line was untenable. A small offensive across the Little Red on May 27 was successful,[8] but lack of supplies forced Curtis to withdraw back across both the Little Red and the White, and he sent a message to the Union leadership in St. Louis, Missouri, on June 4, that he would need to continue his retreat if not reinforced.[9]
The message was forwarded to Major General Henry W. Halleck, who then directed Flag Officer Charles H. Davis to send a flotilla up the White River to Jacksonport to resupply Curtis, as the roads in that region of Arkansas were too poor for easy resupply by land.[10] Halleck also communicated with United States Secretary of War Edwin M. Stanton, who in turn passed the communication to Secretary of the Navy Gideon Welles, who sent a telegram to Davis ordering him to move up the White to relieve Curtis. Davis received Welles's telegram on June 12 and began making immediate preparations for the movement. He asked Colonel Charles R. Ellet, commander of the Ram Fleet, to send some of the ram ships to serve with the vessels of Davis's Western Flotilla, but Ellet would agree to this only under the condition that the Ram Fleet and Western Flotilla vessels would be separate commands, which Davis refused.[11] Less than a week before, on June 6, the Ram Fleet, under Ellet's father Charles Ellet Jr., and Davis's flotilla, had defeated a Confederate naval fleet at the First Battle of Memphis and taken the city of Memphis, Tennessee.[12] The furthest north Confederate stronghold on the Mississippi River was now Vicksburg, Mississippi, as positions upriver at Columbus, Kentucky, and Island Number Ten had been taken earlier in the year. Few Confederate gunboats remained on the upper portion of the Mississippi watershed, and they were generally in hiding.[13]
Kilty moves up the White[edit]

On June 13, Davis's detachment left Memphis.[7] It was composed of the ironclads USS Mound City and USS St. Louis, the timberclad USS Lexington, and the tugboat USS Spitfire.[a] The ships were under the command of Commander Augustus Kilty.[15] On June 14, the steamboat White Cloud arrived at Memphis; it was to transport the supplies that would go to Curtis. Davis had also heard that the Confederates had blocked the White with a submerged wooden raft, which would have to be removed. Expecting the riverbanks to be occupied by Confederate soldiers, Colonel Graham Fitch and his 46th Indiana Infantry Regiment were sent on the transport New National to provide infantry support.[16] Fitch's force was almost 1,000 men strong.[17]
On the morning of June 15, the timberclad USS Conestoga, New National, White Cloud, and the steamboat Jacob Musselman left Memphis to join Kilty. Meanwhile, Spitfire had escorted a captured Confederate steamboat downriver and was replaced by the tugboat USS Spiteful. The two groups of ships united on June 16.[16] On the same day, Kilty's ships approached St. Charles. The vessels made it within 8 miles (13 km) of the defenses. Two scouting parties were sent forward: one on shore and one on Spiteful. They detected the two Confederate batteries, as well as further infantry and naval components, but were unable to provide exact strengths. Fitch and Kilty decided to attack the next morning.[18]
Confederate preparations[edit]
Confederate Major General Thomas C. Hindman had replaced Van Dorn as commander in Arkansas. Working to build up the remnants left by Van Dorn's departure, Hindman declared martial law, authorized guerrilla warfare, and formed the base of an army.[19] After Curtis's expedition bogged down, Hindman anticipated a Union naval movement up either the White or the Arkansas River. He sent out a surveying expedition on June 3 to investigate the possibility of blocking the rivers. When the level of the Arkansas River fell, the Confederates focused on the White. A site near St. Charles was selected as a favorable location for the emplacement of a battery on the bluffs and an obstruction in the river. Captain A. M. Williams and 100 soldiers were sent to construct the emplacements. Logs were floated downriver and driven into the river bottom as an obstruction, and batteries were constructed on the bluffs.[20][21] Two rifled 32-pounder guns were taken from the gunboat CSS Pontchartrain and mounted in the main battery on June 8,[22] while two 3-inch Parrott rifles were sent from Little Rock and placed in a smaller position 400 yards (370 m) away.[20][21] Pontchartrain's guns were placed on a commanding position on a bluff 75 feet (23 m) above a bend in the river. While they had an excellent field of fire, they were also masked by trees and brush.[22] The gunboat CSS Maurepas arrived at St. Charles on June 14. Two days later, Hindman was informed of Kilty's movement. With the obstruction incomplete and no other troops available to reinforce the St. Charles position, 35 sailors and naval officers from Pontchartrain, including Lieutenant John W. Dunnington, the vessel's commander, volunteered and were sent down to help man the defenses. They arrived at 18:00 that day.[20]
On the night of June 16/17, Williams informed Hindman that the Union force had reached the area, and that the obstruction still was not complete. Hindman ordered two civilian steamboats at St. Charles scuttled to block the river.[23] The commander of Maurepas, Captain Joseph Fry, also had his ship, which would have been mismatched against the Union ironclads, scuttled, although a 12-pounder howitzer, a rifled cannon made of brass,[23][24][25] and a third artillery piece were removed first.[26] The lower battery of 3-inch rifles was strengthened with the brass piece from Maurepas and 34 of Williams's men of the 29th Arkansas Infantry Regiment.[21][24] The other members of the Arkansas regiment did not have weapons and were sent back to Little Rock.[21][26] The Confederate sailors were largely armed with single-shot pistols, which would be of dubious value in a land battle.[21] Overall, the Confederates had seven cannons and 114 men at St. Charles.[26]
Battle[edit]

Before daybreak on June 17, the Confederates made dispositions to defend against the attack. Dunnington and his men were in the upper battery manning the two 32-pounders, while men from Maurepas manned the lower position, which contained three guns. The infantrymen were sent downstream under Williams to serve as sharpshooters, and were supported by the 12-pounder howitzer taken off of Maurepas. Fry was in overall command.[27] Around 06:00, Kilty's ships began moving upriver again. Mound City led the approach, with St. Louis, Lexington, and Conestoga following; the other vessels were not armed and were in the rear. Within 2.5 miles (4.0 km) of St. Charles, Confederates were sighted on the river bank. Mound City opened fire and scattered them, after which the Indiana infantry disembarked from Jacob Musselman and New National.[28] Sources disagree as to when the firing began. Historian Ed Bearss states that the firing started at 07:36,[28] while historian Mark Hubbs provides 09:00,[22] and Dunnington stated that the fighting began at around 08:30.[29] Conestoga and Lexington began contributing fire later. Once Fitch's men were ashore, two companies were thrown out as a skirmish line, and the men began advancing towards the Confederate defenses. It was planned for Fitch's men on shore and the ships in the river to move at about the same rate.[28]
Mound City kept steaming forward, and the lower Confederate battery opened fire when the ship was almost upon it, without effect. Kilty was unsure of the exact locations of the Confederate batteries, and had the two timberclads hold back while the ironclads moved forward. For fifteen minutes the two ships dueled with the lower battery, before Mound City moved ahead. And she neared point-blank range of Dunnington's battery, the Confederates opened fire, but at first were unable to damage the Union vessel.[30] Meanwhile, Fitch's men had advanced and were about to attack the lower Confederate position[21] when a solid shot,[31] the third fired from Dunnington's position,[22] struck Mound City at 10:03. The shot hit the ironclad's casemate near a gun port and penetrated the armor, killing three[32] or four sailors outright.[21] The shot then punctured one of the ship's poorly protected steam drums,[24] which connected to the ship's engines and fed them pressurized steam.[33] Steam filled the ship, scalding many of the ship's men. Many of those not near escape points were killed.[21] Of the roughly 175 men onboard Mound City, 105[24] or 125 were killed and a further 25[22] or 44 wounded; only 25[24] or 26 escaped unhurt.[34][31] This shot has been described as the deadliest shot of the war.[24]
With steam pouring out of her and badly scalded men visible on the decks, Mound City drifted downstream and ran into the riverbank near the lower battery. Fry demanded that the remaining Union sailors aboard surrender, and when this was refused, ordered his men to fire on Union sailors in the river trying to swim to safety.[35] Several of the wounded men were killed when the Confederates opened fire.[21] With Mound City out of the fight, St. Louis and Dunnington's guns began dueling, until Fitch signaled for the ships to cease fire.[36] The Union infantrymen were about to storm the Confederate fortifications, and Fitch wanted to prevent accidental friendly fire.[17] Scaling the bluffs, Fitch's men moved into a position from which to outflank the Confederate defenses. Williams attempted to have some of his men occupy Charles Belknap's house as a defensive position, but the Union men beat them to the position. After learning of this, Fry had the guns in the lower battery spiked and the position abandoned.[37] Spiking the cannons involved driving a metal spike into the touch hole of the cannon to temporarily prevent it being capable of firing.[38] After a short skirmish, it became clear that the Confederates would be captured if they did not retreat.[24]
Fry ordered Dunnington to cover the retreat with his men, but Dunnington refused, noting that some of his men were unarmed and those who were had only single-shot pistols which had already been emptied at Mound City's survivors,[39] with no time to reload.[21] A final cannon shot was fired at St. Louis, and the Confederates then scattered with Union troops within 50 yards (46 m).[39] During the retreat, Fry was wounded and captured while trying to reach the Belknap house.[21] In addition to Fry, 29 others were captured, although six of them were prisoners Fry had been holding on suspicion of treason. After taking the Confederate fortifications, Fitch signaled the ships. Lexington and St. Louis advanced up to where the sunken ships blocked the river, while Conestoga and Spiteful towed Mound City downstream.[40] Union soldiers were sent into St. Charles to patrol the town, and the local civilians were warned that it would be razed if guerrilla activity occurred. As punishment for the firing on Mound City's wounded, 20 of the Confederate prisoners were placed under arrest,[21] including Fry.[41] The battle was over in under four hours.[25]
Aftermath[edit]

Kilty was among those scalded on Mound City, and his wounds resulted in the loss of an arm. Lieutenant Wilson McGunnegle, commander of St. Louis, replaced him as expedition commander. The highest-ranking unhurt officer of Mound City had been unnerved by the events and was replaced by an officer from Conestoga. The 58- or 59-man replacement crew for Mound City was drawn from the 46th Indiana.[21][42] Either 58[43] or 59[21] Union dead were buried in a mass grave at the lower battery,[43] while eight Confederates were buried in St. Charles.[21] Hindman claimed losses of six dead and one wounded.[24] The Civil War Battlefield Guide estimates that the Union had about 160 casualties and that the Confederates lost 40.[44] No serious casualties were suffered by the 46th Indiana during its capture of the batteries.[22] The historian Mark K. Christ provides Confederate losses as eight killed and 24 wounded. Historian Mark Hubbs suggests that seven percent of all Union Navy battle deaths in the entire war were the result of the single catastrophic shot that struck Mound City.[45] The Union wounded were sent back down to Memphis on Conestoga. Six Confederate cannons had been captured on the field.[46] Four were sent to Memphis, and the two 32-pounders were spiked and dumped into the river. The Union troops destroyed the Confederate fortifications after the battle.[22]
Hindman had sent the 10th Texas Infantry Regiment to reinforce St. Charles, but the unit had to delay to be issued ammunition. By the time this was done, it was June 17. After learning of the fall of St. Charles, the Texans withdrew to DeValls Bluff, where they were reinforced by another regiment, a battalion, and three artillery batteries.[47] Establishing a supply point at St. Charles,[24] McGunnegle's fleet moved past the river obstructions and continued up the White.[21] The movement began on June 18, although Mound City was left behind.[48] The damaged ironclad later returned to service and survived the war.[49] After meeting sporadic Confederate resistance on June 19, the vessels reached Clarendon, Arkansas,[50] where they halted due to low water. Fitch took his men ashore and advanced 5 miles (8.0 km) but withdrew after losing 55 men in a fight with Confederate dismounted cavalry.[21] After leaving Clarendon, McGunnegle's flotilla continued north, where they halted for the night at a point in Monroe County known as Crooked Point Cutoff.[24][51]

At Crooked Point Cutoff, McGunnegle was informed by his pilots that falling river levels would likely strand the ships if they continued further north, so the decision was made to turn around. Fitch was opposed to falling back without resupplying Curtis, but the ships turned back on the morning of June 20.[52] By June 25, they had returned to the mouth of the river. On June 23, Major General Ulysses S. Grant had taken command of Union forces in Memphis. After receiving communication from Halleck that he still wanted Curtis reinforced, Grant sent additional supply vessels and transports loaded with the 34th and 43rd Indiana Infantry Regiments to join the White River flotilla on June 26.[53] The new vessels reached the others on June 27, and Lexington, Conestoga, and Spiteful escorted the transports and supply ships upriver, leaving on June 28 under the command of Lieutenant James Shirk.[54] At noon on June 30, Shirk's vessels reached Clarendon. With water levels falling, Shirk would not venture beyond the town. Fitch wanted to continue, but learned of a new Confederate strongpoint at DeValls Bluff, and decided that the infantry could not take the position without the gunboats.[55] The Union ships turned back down the river on July 3, but began heading back upriver again on July 5.[56] Union forces reoccupied Clarendon on July 7.[57]
Curtis learned that the vessels would not be able to reach his position, so he severed his line of supply and had his men march down the White for two weeks. This was the first time in the war that a Union army had campaigned without a direct line of supply;[31] this would not occur again until the Vicksburg campaign the next year.[58] Curtis emancipated slaves during this movement, and foraging and plundering by his soldiers economically devastated the line of the march.[31][58] In one county alone, $1,500,000 of property damage was inflicted.[21] The Confederates made only one serious attempt to halt Curtis's movement. On July 7, Brigadier General Albert Rust led Confederate cavalry in an assault on the Union force while it was crossing the Cache River. In the ensuing Battle of Cotton Plant, Rust's attack was repulsed, and his men were then routed by a Union counterattack.[59] McGunnegle's vessels had stayed at Clarendon until July 8, and Curtis's men did not reach there until July 9. Having missed his supply rendezvous, Curtis had his troops leave the White and march to the Mississippi River town of Helena, which was reached on July 12.[60] The relief column itself turned up at Helena on July 15.[61] Helena was later used as a significant operating hub for the Union Army in the Vicksburg campaign; the Confederates never retook the city.[45]
Battlefield preservation[edit]
A portion of the battlefield is listed on the National Register of Historic Places (NRHP) as the St. Charles Battle Site. Divers recovered two cannons from the river bottom in the 1930s and the Belknap house burned in 1962.[25] Also on the NRHP is the St. Charles Battle Monument, a commemorative marker placed in 1919. Unusually for a monument in the South, it commemorates both sides of the battle.[62]
Notes[edit]
References[edit]
- ^ a b Dougan, Michael B. (December 3, 2018). "Secession Convention". Encyclopedia of Arkansas. Archived from the original on October 9, 2021. Retrieved October 9, 2021.
- ^ McPherson 1998, pp. 1–4.
- ^ Shea & Hess 1998, pp. 34–38.
- ^ Shea & Hess 1992, pp. 286–289.
- ^ Shea & Hess 1992, pp. 292–293.
- ^ a b Shea 1994, p. 41.
- ^ a b Christ 2012, p. 407.
- ^ a b Shea & Hess 1992, pp. 299–300.
- ^ Bearss 1962, p. 305.
- ^ Bearss 1962, pp. 305–306.
- ^ Bearss 1962, pp. 306–309.
- ^ McPherson 2012, pp. 88–89.
- ^ Chatelain 2020, p. 132.
- ^ Palucka 2017, p. 73.
- ^ Bearss 1962, p. 309.
- ^ a b Bearss 1962, pp. 312–314.
- ^ a b Chatelain 2020, p. 182.
- ^ Bearss 1962, pp. 313–314.
- ^ Shea 1994, pp. 38–39.
- ^ a b c Bearss 1962, pp. 315–318.
- ^ a b c d e f g h i j k l m n o p q r Barnhart, Donald Jr. (2006). "The Deadliest Shot: The Doomed White River Expedition". Civil War Times. Archived from the original on October 8, 2021. Retrieved October 8, 2021 – via historynet.com.
- ^ a b c d e f g Hubbs, Mark (April 2002). "A Rebel Shot Causes "Torture and Despair"". Naval History. 16 (2): 46–50. ISSN 1042-1920. OCLC 772653183.
- ^ a b Bearss 1962, p. 318.
- ^ a b c d e f g h i j Honnoll, W. Danny (May 29, 2018). "Engagement at St. Charles". Encyclopedia of Arkansas. Archived from the original on October 8, 2021. Retrieved October 8, 2021.
- ^ a b c Kirk, Dianna (September 10, 1974). "St. Charles Battle Site" (PDF). Arkansas Heritage. Archived (PDF) from the original on October 10, 2021. Retrieved October 10, 2021.
- ^ a b c Chatelain 2020, p. 181.
- ^ Bearss 1962, p. 321.
- ^ a b c Bearss 1962, pp. 319–320.
- ^ Christ 2012, p. 414.
- ^ Bearss 1962, pp. 322–324.
- ^ a b c d Shea 1994, p. 42.
- ^ Bearss 1962, p. 324.
- ^ "U.S.S. Cairo Boilers and Engines" (PDF). American Society of Mechanical Engineers. June 15, 1992. Retrieved December 3, 2021.
- ^ Bearss 1962, p. 330.
- ^ Bearss 1962, p. 325.
- ^ Bearss 1962, pp. 325–326.
- ^ Bearss 1962, pp. 327–328.
- ^ Scientific American 1861, p. 80.
- ^ a b Bearss 1962, p. 328.
- ^ Bearss 1962, p. 329.
- ^ Bearss 1962, p. 333.
- ^ Bearss 1962, p. 335.
- ^ a b Bearss 1962, p. 332.
- ^ Kennedy 1998, p. 38.
- ^ a b Christ 2012, p. 423.
- ^ Bearss 1962, pp. 332–333.
- ^ Bearss 1962, pp. 333–334.
- ^ Bearss 1962, pp. 335–336.
- ^ Christ 2012, p. 415.
- ^ Bearss 1962, pp. 336–337.
- ^ Bearss 1962, p. 337.
- ^ Bearss 1962, pp. 337–338.
- ^ Bearss 1962, pp. 343–344.
- ^ Bearss 1962, pp. 344–345.
- ^ Bearss 1962, pp. 346–348.
- ^ Bearss 1962, pp. 350–351.
- ^ Bearss 1962, p. 357.
- ^ a b Shea & Hess 1992, pp. 300–301.
- ^ Shea & Hess 1992, pp. 302–303.
- ^ Shea & Hess 1992, p. 303.
- ^ Bearss 1962, p. 361.
- ^ Christ, Mark K. (February 14, 2020). "St. Charles Battle Monument". Encyclopedia of Arkansas. Archived from the original on October 10, 2021. Retrieved October 10, 2021.
Sources[edit]
- Bearss, Edwin C. (1962). "The White River Expedition June 10–July 15, 1862". Arkansas Historical Quarterly. 21 (4): 305–362. doi:10.2307/40035686. ISSN 0004-1823. JSTOR 40035686. OCLC 150147194.
- Chatelain, Neil P. (2020). Defending the Arteries of Rebellion: Confederate Naval Operations in the Mississippi River Valley, 1861–1865. El Dorado Hills, California: Savas Beatie. ISBN 978-1-61121-510-6.
- Christ, Mark K. (2012). ""The Awful Scenes That Met My Eyes": Union and Confederate Accounts of the Battle of St. Charles, June 17, 1862". Arkansas Historical Quarterly. 71 (4): 407–423. ISSN 0004-1823. OCLC 150147194.
- Kennedy, Frances H., ed. (1998). The Civil War Battlefield Guide (2nd ed.). Boston/New York: Houghton Mifflin. ISBN 978-0-395-74012-5.
- McPherson, James M. (2012). War on the Waters: The Union & Confederates Navies, 1861–1865. Chapel Hill: University of North Carolina Press. ISBN 978-0-8078-3588-3.
- McPherson, James M. (1998). "Fort Sumter I, South Carolina". In Kennedy, Frances H. (ed.). The Civil War Battlefield Guide (2nd ed.). Boston/New York: Houghton Mifflin. pp. 1–4. ISBN 978-0-395-74012-5.
- Palucka, Tim (2017). "Timberclads, Tinclads, and Cottonclads in the US Civil War". MRS Bulletin. 42 (1): 73. Bibcode:2017MRSBu..42...73P. doi:10.1557/mrs.2016.317. ISSN 1938-1425.
- Shea, William L. (1994). "1862: "A Continual Thunder"". In Christ, Mark K. (ed.). Rugged and Sublime: The Civil War in Arkansas. Fayetteville: University of Arkansas Press. pp. 22–58. ISBN 1-55728-356-7.
- Shea, William L.; Hess, Earl J. (1992). Pea Ridge: Civil War Campaign in the West. Chapel Hill: University of North Carolina Press. ISBN 0-8078-4669-4.
- Shea, William L.; Hess, Earl J. (1998). "Pea Ridge, Arkansas". In Kennedy, Frances H. (ed.). The Civil War Battlefield Guide (2nd ed.). Boston/New York: Houghton Mifflin. pp. 34–37. ISBN 978-0-395-74012-5.
- "Spiking Cannon". Scientific American. 4 (5): 80. February 2, 1861. JSTOR 24958666.
External links[edit]
| Combatants | |||||||||
|---|---|---|---|---|---|---|---|---|---|
| Campaigns | |||||||||
| Battles |
| ||||||||
| Aftermath |
| ||||||||
- Battle of St. Charles
- 1862 in Arkansas
- 1862 in the American Civil War
- Battles of the American Civil War in Arkansas
- Battles of the Trans-Mississippi Theater of the American Civil War
- History of Arkansas County, Arkansas
- June 1862 events
- Naval battles of the American Civil War
- Riverine warfare
- Union victories of the American Civil War