Battle of Neresheim
| Battle of Neresheim | |||||||
|---|---|---|---|---|---|---|---|
| Part of the French Revolutionary War | |||||||
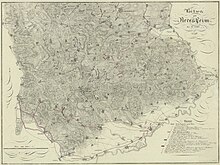 Plan of the battle of Neresheim (published in 1828) | |||||||
| |||||||
| Belligerents | |||||||
|
|
| ||||||
| Commanders and leaders | |||||||
|
|
| ||||||
| Units involved | |||||||
|
|
| ||||||
| Strength | |||||||
| 44,737 | 43,000 | ||||||
| Casualties and losses | |||||||
| 2,400–3,000 | 1,600–3,000 | ||||||
Location within Germany | |||||||
The Battle of Neresheim (11 August 1796) was fought by the Republican French army under Jean Victor Marie Moreau against the army of the Habsburg monarchy of Archduke Charles, Duke of Teschen. Pursued by Moreau's Army of Rhin-et-Moselle, Charles launched an attack against the French. While the Austrian left wing saw some success, the battle degenerated into a stalemate and the archduke withdrew further into the Electorate of Bavaria. Neresheim is located in the state of Baden-Württemberg in Germany a distance of 57 kilometres (35 mi) northeast of Ulm. The action took place during the War of the First Coalition, part of a larger conflict called the French Revolutionary Wars.
In the Rhine Campaign of 1796, two French armies successfully breached the Rhine River to invade Germany, Moreau's army in the south and Jean-Baptiste Jourdan's Army of Sambre-et-Meuse in the north. The French armies operated independently while Charles commanded both Maximilian Anton Karl, Count Baillet de Latour's Army of the Upper Rhine in the south and Wilhelm von Wartensleben's Army of the Lower Rhine in the north. Charles hoped to concentrate superior strength against one of the two French armies. To keep his enemies separated, the archduke wished to lure Moreau south of the Danube River by crossing to the south bank. To allow his columns to cross the river safely, Charles attacked the French, hoping to push them back. Though he failed to defeat the French, the battle gave the archduke enough space to get his troops over the Danube without interference. Though he had a chance to join his army to Jourdan's in the north, Moreau soon crossed to the south bank in pursuit.
Background[edit]
On 8 June 1796, the Army of Rhin-et-Moselle commanded by Jean Victor Marie Moreau numbered 71,581 foot soldiers and 6,515 cavalry, not counting artillerists. The army was formed into a Right Wing under Pierre Marie Barthélemy Ferino, a Center led by Louis Desaix and a Left Wing directed by Laurent Gouvion Saint-Cyr. Ferino's three divisions were led by François Antoine Louis Bourcier, 9,281 infantry and 690 cavalry, Henri François Delaborde, 8,300 infantry and 174 cavalry and Augustin Tuncq, 7,437 infantry and 432 cavalry. Desaix's three divisions were commanded by Michel de Beaupuy, 14,565 infantry and 1,266 cavalry, Antoine Guillaume Delmas, 7,898 infantry and 865 cavalry, and Charles Antoine Xaintrailles, 4,828 infantry and 962 cavalry. Saint-Cyr's two divisions were under Guillaume Philibert Duhesme, 7,438 infantry and 895 cavalry, and Alexandre Camille Taponier, 11,823 infantry and 1,231 cavalry.[1] With artillerymen, Moreau's host counted a total of 79,592 soldiers.[2]
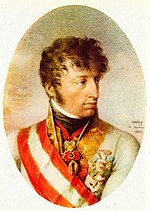
Originally, the Army of Rhin-et-Moselle was opposed by 82,776 Austrians and allies under Dagobert Sigmund von Wurmser.[3] But 25,330 Austrians were soon transferred to Italy and Wurmser went with this force on 18 June. Maximilian Anton Karl, Count Baillet de Latour was appointed the new commander of the Army of the Upper Rhine. The former leader of the Army of the Lower Rhine, Archduke Charles, Duke of Teschen was replaced by Wilhelm von Wartensleben so he could take overall command of both Austrian armies.[2]

On 24 June 1796, the Army of Rhin-et-Moselle mounted a successful assault crossing of the Rhine River in the Battle of Kehl. The French sustained losses of 150 killed, wounded and missing out of 10,065 engaged. The Swabian Regional Contingent defenders numbered 7,000 soldiers in eight foot battalions, eight horse squadrons and two artillery batteries. The Swabians suffered over 700 casualties and lost 14 guns and 22 munition wagons. Moreau's forces inflicted a second defeat on a force of 9,000 Swabians and their Austrian allies under Anton Sztáray at Renchen on 28 June. This time the French reported only 200 casualties while inflicting 550 killed and wounded on their enemies. In addition, the French captured 850 soldiers, seven guns and two munition wagons.[4] During this period of maneuvering, Moreau switched the positions of two of his wings. Ferino still commanded the Right Wing, but Desaix now commanded the Left Wing while Saint-Cyr led the Center.[2]
On 30 June, Latour's Army of the Upper Rhine was divided into a Left Wing under Michael von Fröhlich, a Center led by Karl Aloys zu Fürstenberg and a Right Wing that Latour personally controlled. Fröhlich's wing was made up of eight battalions and 12 squadrons of Austrians organized in two brigades. Fürstenberg's command consisted of 17 battalions, five companies and 10 squadrons, including Swabians and Bavarians, organized into five brigades. Latour's wing had 25 battalions and 58 squadrons organized into five divisions under Prince von Fürstemberg, Johann Mészáros von Szoboszló, Johann Sigismund Riesch, Karl von Riese, and Sztáray. There were an additional six battalions and six squadrons holding Mannheim and one battalion garrisoning Philippsburg. Archduke Charles was approaching with an Austrian division under Friedrich Freiherr von Hotze and a Saxon division under General von Lindt. Hotze directed 16 battalions and 20 squadrons in three brigades while Lindt commanded nine battalions and 19 squadrons in five brigades.[5]
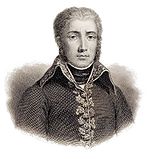
With Desaix on the left and Saint-Cyr on the right, Moreau pressed north up the east bank of the Rhine to the Murg River. The French thrust severed Austrians under Fröhlich and French Royalists under Louis Joseph, Prince of Condé from the remainder of Latour's army.[6] Ferino's wing pursued Fröhlich and Condé to the southeast and seized the region around Freiburg im Breisgau. On the Murg, Desaix won a minor victory over Latour in the Battle of Rastatt. By this time, Archduke Charles arrived from the north with 20,000 reinforcements. The archduke planned to attack on 10 July, but Moreau preempted him by one day. In the Battle of Ettlingen on the 9th, both commanders tried to hold with their left wings and attack with their right. On Moreau's right, Saint-Cyr was successful in driving back Konrad Valentin von Kaim's Austrians near Frauenalb while Taponier's division pushed back Lindt's Saxons near Neuenbürg. On the French left, Desaix captured Malsch twice but was ultimately driven out. Despite having won the battle on his right flank, Charles feared Saint-Cyr's advance might cut him off from his supply base at Heilbronn so the archduke ordered a retreat to the east.[7]
Archduke Charles stopped long enough at Pforzheim to transfer his military stores to the army's wagon train. Moreau was surprised by his foe's decision to disengage and took several days to digest this information. The French commander planned to attack Pforzheim on 15 July, but by that date Charles was retreating farther to the east.[8] On 21 July, there was a skirmish at Cannstatt near Stuttgart. There were 8,000 Austrians in nine battalions and eight squadrons involved in the clash.[9] From Cannstatt, Charles retreated toward Schwäbisch Gmünd with Moreau following his enemies at a leisurely pace. Meanwhile, the isolated Austrian left wing withdrew through Villingen[7] with Ferino in pursuit. The Swabians and Bavarian began negotiations with the French to quit the war while the Saxons marched away to the north to join Wartensleben's army. When Charles left the banks of the Rhine he left behind 30,000 troops in garrisons at Mannheim, Philippsburg, Mainz, Königstein im Taunus and Ehrenbreitstein Fortress.[10] On 29 July at Biberach an der Riss, the Swabian Regional Contingent was disarmed by Fröhlich on the instructions of Charles.[4] These subtractions left Charles with only three-quarters of the strength of Moreau. On 2 August, Moreau's troops bumped into the Austrians at Geislingen an der Steige and for a week afterward there was constant skirmishing with Charles' rear guard.[10] Saint-Cyr occupied the city of Ulm on 8 August 1796. Two days later, Charles was joined by his left wing.[11] At this time Ferino was at Memmingen to the south of the Danube.[10]
Battle[edit]

On 13 July in Desaix's Left Wing, the division of Delmas consisted of the 50th and 97th Line and 16th Light Infantry Demi-Brigades and four squadrons each of the 7th Hussar and 10th and 17th Dragoon Regiments. Delmas' brigade commanders were Jean Marie Rodolph Eickemayer, who had been recruited from Mainz, and Maurice Frimont. The division of Beaupuy was made up of the 10th, 62nd and 103rd Line and the 10th Light Demi-Brigades, 4th and 8th Chasseurs à Cheval and the 6th Dragoons. Beaupuy's brigadiers were Gilles Joseph Martin Brunteau Saint-Suzanne and Dominique Joba. Bourcier's Reserve division comprised the 93rd and 109th Line, the 1st and 2nd Carabiniers and the 2nd, 3rd, 9th, 14th and 15th Cavalry Regiments. All demi-brigades had three battalions, all Cavalry regiments had three squadrons, while the Carabiniers, Chasseurs, Dragoons and Hussars had four squadrons.[12]

A report from 7 August 1796 showed that Saint-Cyr shuffled the brigades in the Center so that Duhesme's division had only one while Taponier had the other three. In Duhesme's division, Dominique Vandamme's brigade was made up of the 17th and 100th Line Infantry Demi-brigades, two squadrons of the 20th Chasseurs à Cheval and a detachment of the 11th Hussars, a total of 5,272 infantry and 292 cavalry. Taponier's division included the brigades of Antoine Laroche Dubouscat, Claude Lecourbe and Henri François Lambert. Laroche directed 5,124 soldiers of the 21st Light and 31st Line Infantry, Lecourbe commanded 5,878 men of the 84th and 106th Line and Lambert controlled 5,888 troops of the 93rd and 109th Line. Two squadrons of 240 sabers from the 2nd Chasseurs à Cheval were attached to Lecourbe's brigade. Altogether, there were 22,162 foot soldiers, 532 horsemen and 433 gunners in Saint-Cyr's command.[13] In addition to the other units, the 9th Hussars were normally attached to Taponier's division.[12]
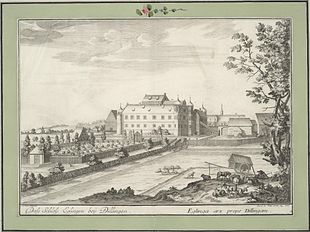
Archduke Charles wished to prevent the army of Moreau from joining with his colleague Jean-Baptiste Jourdan and the Army of Sambre-et-Meuse. The Austrian commander hoped to withdraw to the south bank of the Danube but the Army of Rhin-et-Moselle was following too closely. By attacking Moreau, the archduke hoped to push the French back in order to prevent their two armies from merging and to give his own troops enough room to cross the Danube safely. Also, he wanted to lure Moreau into crossing the Danube and separating himself from Jourdan. Moreau's army was extended across a front 25 miles (40 km) wide. Charles drew up plans to attack on 11 August. He sent one column to cross to the north bank of the Danube at Günzburg to get behind the French right flank. His troops were ready to move at midnight, but heavy rains slowed several of his assault columns.[10] On the 10th Saint-Cyr with Taponier's division, drove the Austrians in his front out of the village of Eglingen. Urged on by Moreau, Saint-Cyr balked because he believed that the enemy were in strength nearby. Before anything more could be done, the heavy rain began and made it impossible to fire the cannons on both sides. Moreau refused to let his subordinate withdraw to a more defensible position or to order Duhesme's division to move closer. The only concession Moreau would make was to send up one regiment of Carabiniers to patrol in front of Taponier. To be on the safe side, Saint-Cyr stationed Lecourbe and one demi brigade at Dischingen where there was a bridge over the Egau River. Meanwhile, Duhesme stayed well to the south at Medlingen in the Danube valley.[14]
The Austrian archduke commanded 43,000 men while Moreau led 44,737 troops. Charles massed his main strength against Saint-Cyr, who commanded 30,426 soldiers if the nearby Reserve was included.[14] On the right flank, Johann I Joseph, Prince of Liechtenstein led the Advance Guard while Sztáray led the Reserve. They would operate against Bopfingen and seize the Neresheim-Nördlingen road. Charles personally led 5,000 infantry and 1,500 cavalry on Dunstelkingen in the center. To Charles' immediate right, Hotze directed 7,500 foot and 1,800 horse toward Kösingen and Schweindorf. To Charles' immediate left, Latour's 5,500 troops would clear Eglingen and Dischingen. On the left flank, Fröhlich was in charge of the force that would cross the Danube behind the French right flank. He would cooperate with Riese's troops.[15] The outnumbered Duhesme was to be assailed by 7,000 infantry and 2,400 cavalry.[16] Once they crushed the French right flank, 3,000 men under Karl Mercandin were to attack Dischingen while the rest were supposed to circle behind Moreau's army and keep it from escaping.[15]
The sudden Austrian advance at dawn caused the 150-strong regiment of Carabiniers to retreat at the gallop. Saint-Cyr's light cavalry, led by Étienne Marie Antoine Champion de Nansouty,[14] lost heart at seeing the heavy cavalry fleeing and fell back, leaving the French infantry at Eglingen without support. The Austrian horse fell on the flank of Lambert's brigade, routing its six battalions. This left Taponier's division with 12 battalions to face Charles' assault. At this moment Moreau arrived at Saint-Cyr's headquarters. Before riding off to consult with Desaix, the French army commander placed Bourcier's division in support nearby and agreed to have the Left Wing attack the Austrian right flank. Saint-Cyr deployed nine battalions at Dunstelkingen while keeping Lecourbe's three battalions to protect his right rear at Dischingen. At 9:00 AM the Austrians attacked this position but were beaten back. Their artillery set Dunstelkingen on fire but this actually helped prevent the Austrians from advancing. Moreau then returned from his meeting with Desaix to inform Saint-Cyr that the Left Wing's attack would be delayed until Delmas' division could be recalled from the extreme left.[17]
Hotze seized Kösingen but found himself facing a new French line on high ground between him and Neresheim. He attacked this position but was repulsed by Desaix. On Hotze's right, Honoré Théodore Maxime Gazan drove the Austrians back to Schweindorf. The Austrians took Bopfingen but found that the French were moving south to assist the center.[15] The clash at Bopfingen was fought by the Duke Albert Carabinier Regiment Nr. 5 and the Siebenburger Hussar Regiment Nr. 47.[18] Desaix had little trouble fending off these advances. But a message came from the far right that said Duhesme's division was in trouble.[19] Riese attacked Duhesme at Medlingen, forcing him to retreat. A large force of Austrian cavalry reached Giengen to block the French retreat, but Duhesme escaped to the northwest. Mercandin ended the day 3 miles (5 km) short of Dischingen and Riese moved west to Heidenheim an der Brenz rather than making a sweep into the French rear. Fröhlich's column only got as far as Albeck, north of Ulm.[15] Duhesme's division lost some cannons and was not able to rejoin Saint-Cyr for three days. The Center's artillery park at Heidenheim hurriedly displaced north to Aalen. This left Saint-Cyr's troops with no reserve artillery ammunition and dependent on supply from Bourcier's small artillery park. Moreau appeared a third time at Saint-Cyr's headquarters promising that Desaix would soon attack the Austrian right flank. Though Saint-Cyr was in a tight spot, in fact, Charles became anxious about Moreau's commitment of the French Reserve.[19]
The Austrians declined to launch any more serious assaults on Taponier's division and by 1:00 PM the contest degenerated into an artillery duel. Part of Lambert's brigade was rallied and reoccupied Heidenheim. The Austrians threatening the French right flank began withdrawing to Dillingen an der Donau. For the fourth time that day Moreau came to see Saint-Cyr, this time accompanied by Desaix. They informed their colleague that Delmas' division was not available yet and it was too late to attack the Austrian right that day. Everything would be ready the next day.[16] Charles hoped that Moreau might concede defeat, but the morning of 12 August found the French army still in position. Charles then gave the order to fall back. Worried about the artillery ammunition shortage, Moreau did not attack Charles' right, but neither did he panic and retreat. Instead he held his position all day on the 12th waiting for confirmation that the Austrians were withdrawing across the Danube.[20]
Besides the two cavalry regiments that fought at Bopfingen, the Austrian units that came into action were four battalions of Infantry Regiments Reisky Nr. 13 and Slavonier Grenz, three battalions each of Infantry Regiments Manfredini Nr. 12, Nádasdy Nr. 39 and Kinsky Nr. 47, two battalions of Infantry Regiment Schröder Nr. 7, one battalion each of Infantry regiments Archduke Charles Nr. 3, Alton Nr. 15 and Ligne Nr. 30, the Apfaltrern, Candiani, Pietsch and Retz Grenadier Battalions, elements of Archduke Ferdinand Hussar Regiment Nr. 32 and four squadrons of the Archduke Franz Cuirassier Regiment Nr. 29.[18]
Results[edit]

According to one source that called the battle a French victory, the Austrians lost 1,100 killed and wounded plus 500 captured while the French suffered 1,200 killed and wounded plus 1,200 captured.[18] Another authority characterized the action as a "drawn battle" and stated that casualties numbered 3,000 on each side. The Austrian retreat was not molested by the French, which was one of the reasons why Charles fought the battle. The Austrian army crossed the Danube at Dillingen and Donauwörth, destroying all the bridges behind them.[21] Furious with Duhesme for retreating, Moreau removed him from command of his division. Saint-Cyr persuaded him to rescind the order a few days later.[20]
Moreau deserved criticism for spreading his forces too widely but he can be credited for keeping his composure despite the defeat of Duhesme.[16] But Moreau now fell into a fatal strategic error. Charles entertained a desire to combine forces with Wartensleben at the earliest opportunity in order to defeat Jourdan's army. When Charles withdrew to the south bank of the Danube, he left Moreau free to stay on the north bank and join with Jourdan. Charles hoped to lure his opponent onto the south bank which would take Moreau farther away from Jourdan. In fact, Moreau did not begin to advance until 14 August and then he headed for the Danube crossings. Meanwhile, Charles retreated rapidly, increasing the distance between his army and Moreau, but also giving himself more room to maneuver. On 18 and 19 August Moreau's army finally crossed to the south bank of the Danube. But on the 17th the archduke made a crucial strategic move. Leaving Latour with 30,288 troops plus Condé's 5,000-6,000 men, Charles and 28,000 troops recrossed to the north bank, heading for a rendezvous with Wartensleben. Ignoring this move, Moreau moved steadily to the east on the south bank of the Danube.[22] Napoleon later wrote of Moreau, "One would have said that he was ignorant that a French army existed on his left".[23] The next actions were the Battle of Amberg[18] and the Battle of Friedberg, both on 24 August 1796.[24]
Notes[edit]
- ^ Smith (1998), p. 111
- ^ a b c Phipps, Ramsay Weston (2011). The Armies of the First French Republic: Volume II The Armées du Moselle, du Rhin, de Sambre-et-Meuse, de Rhin-et-Moselle. USA: Pickle Partners Publishing. p. 290. ISBN 978-1-908692-25-2.
- ^ Phipps (2010), p. 274
- ^ a b Smith (1998), pp. 115-116
- ^ Nafziger, George. "Austrian Army of the Upper Rhine, 30 June 1796" (PDF). US Army Combined Arms Center. Archived from the original (PDF) on 6 October 2014. Retrieved 1 October 2014.
- ^ Dodge (2011), p. 288
- ^ a b Dodge (2011), p. 290
- ^ Phipps (2011), p. 294
- ^ Smith (1998), p. 117
- ^ a b c d Dodge (2011), p. 292
- ^ Phipps (2011), p. 317
- ^ a b Nafziger, George. "French Army of the Rhine-and-Moselle, 13 July 1796" (PDF). US Army Combined Arms Center. Archived from the original (PDF) on 23 September 2015. Retrieved 2 October 2014. This source placed the 93rd and 109th Line in the Reserve rather than in the Center.
- ^ Nafziger, George. "French Army of the Rhine-and-Moselle, Center Corps, 7 August 1796" (PDF). US Army Combined Arms Center. Archived from the original (PDF) on 23 September 2015. Retrieved 2 October 2014.
- ^ a b c Phipps (2011), pp. 319-320
- ^ a b c d Rickard, J. (2009). "Battle of Neresheim, 11 August 1796". historyofwar.org. Retrieved 5 October 2014.
- ^ a b c Phipps (2011), p. 323
- ^ Phipps (2011), p. 321. This source stated that Laroche's brigade was routed but twice afterward said that it was Lambert's troops that ran away.
- ^ a b c d Smith (1998), p. 120
- ^ a b Phipps (2011), p. 322
- ^ a b Phipps (2011), p. 324
- ^ Dodge, Theodore Ayrault (2011). Warfare in the Age of Napoleon: The Revolutionary Wars Against the First Coalition in Northern Europe and the Italian Campaign, 1789-1797. USA: Leonaur Ltd. p. 293. ISBN 978-0-85706-598-8.
- ^ Phipps (2011), pp. 325-326
- ^ Dodge (2011), p. 296
- ^ Smith (1998), p. 121
References[edit]
- Dodge, Theodore Ayrault (2011). Warfare in the Age of Napoleon: The Revolutionary Wars Against the First Coalition in Northern Europe and the Italian Campaign, 1789-1797. USA: Leonaur Ltd. ISBN 978-0-85706-598-8.
- Nafziger, George. "Austrian Army of the Upper Rhine, 30 June 1796" (PDF). US Army Combined Arms Center. Archived from the original (PDF) on 6 October 2014. Retrieved 1 October 2014.
- Nafziger, George. "French Army of the Rhine-and-Moselle, 13 July 1796" (PDF). US Army Combined Arms Center. Archived from the original (PDF) on 23 September 2015. Retrieved 2 October 2014.
- Nafziger, George. "French Army of the Rhine-and-Moselle, Center Corps, 7 August 1796" (PDF). US Army Combined Arms Center. Archived from the original (PDF) on 23 September 2015. Retrieved 2 October 2014.
- Phipps, Ramsay Weston (2011). The Armies of the First French Republic: Volume II The Armées du Moselle, du Rhin, de Sambre-et-Meuse, de Rhin-et-Moselle. USA: Pickle Partners Publishing. ISBN 978-1-908692-25-2.
- Rickard, J. (2009). "Battle of Neresheim, 11 August 1796". historyofwar.org. Retrieved 5 October 2014.
- Smith, Digby (1998). The Napoleonic Wars Data Book. London: Greenhill. ISBN 1-85367-276-9.
See also[edit]
- Pope, Stephen. The Cassell Dictionary of the Napoleonic Wars, Cassell (1999)
External links[edit]
 Media related to Battle of Neresheim at Wikimedia Commons
| Preceded by Battle of Theiningen |
French Revolution: Revolutionary campaigns Battle of Neresheim |
Succeeded by Battle of Amberg |

